
Have you ever wanted to make your own Greek yogurt? I’ve made this recipe countless times, and you can, too. Just follow the easy directions and enjoy thick, creamy homemade Greek yogurt any time you like.
I first published this recipe on March 6, 2011. Hundreds of readers added comments and questions over the years, so now I’ve updated the post with new photos and more information.
Back in 2011 a blog was often like an online diary, but these days most readers want the information presented quickly and concisely. “We don’t want to read your life story!” they say, so I’ve removed my original scintillating intro about tasting FAGE Greek yogurt for the first time at my aunt’s home.
There’s even a “jump to recipe” button at the top of the post now, so you can skip the step by step tutorial if you wish and go straight to the printable recipe card. What a time to be alive!
Shall we make some delicious homemade Greek yogurt?

This post may contain affiliate links. Please read our disclosure policy.
Why You’ll Love This Recipe
Amazing Flavor and Texture: Thick, creamy Greek yogurt compares to regular yogurt like a home-grown tomato compares to a February grocery store tomato; it tastes a kazillion times better!
Economical: If you eat a lot of Greek yogurt like I do (almost every morning), the cost can add up. Making your own yogurt from scratch is easy and saves money!
All Natural: You’ll have total control over the ingredients, so you can avoid the additives in store-bought yogurt and make a very pure product.
Ingredients Notes
You only need two simple ingredients to make 48 ounces of your own fantastic, creamy, thickened yogurt:
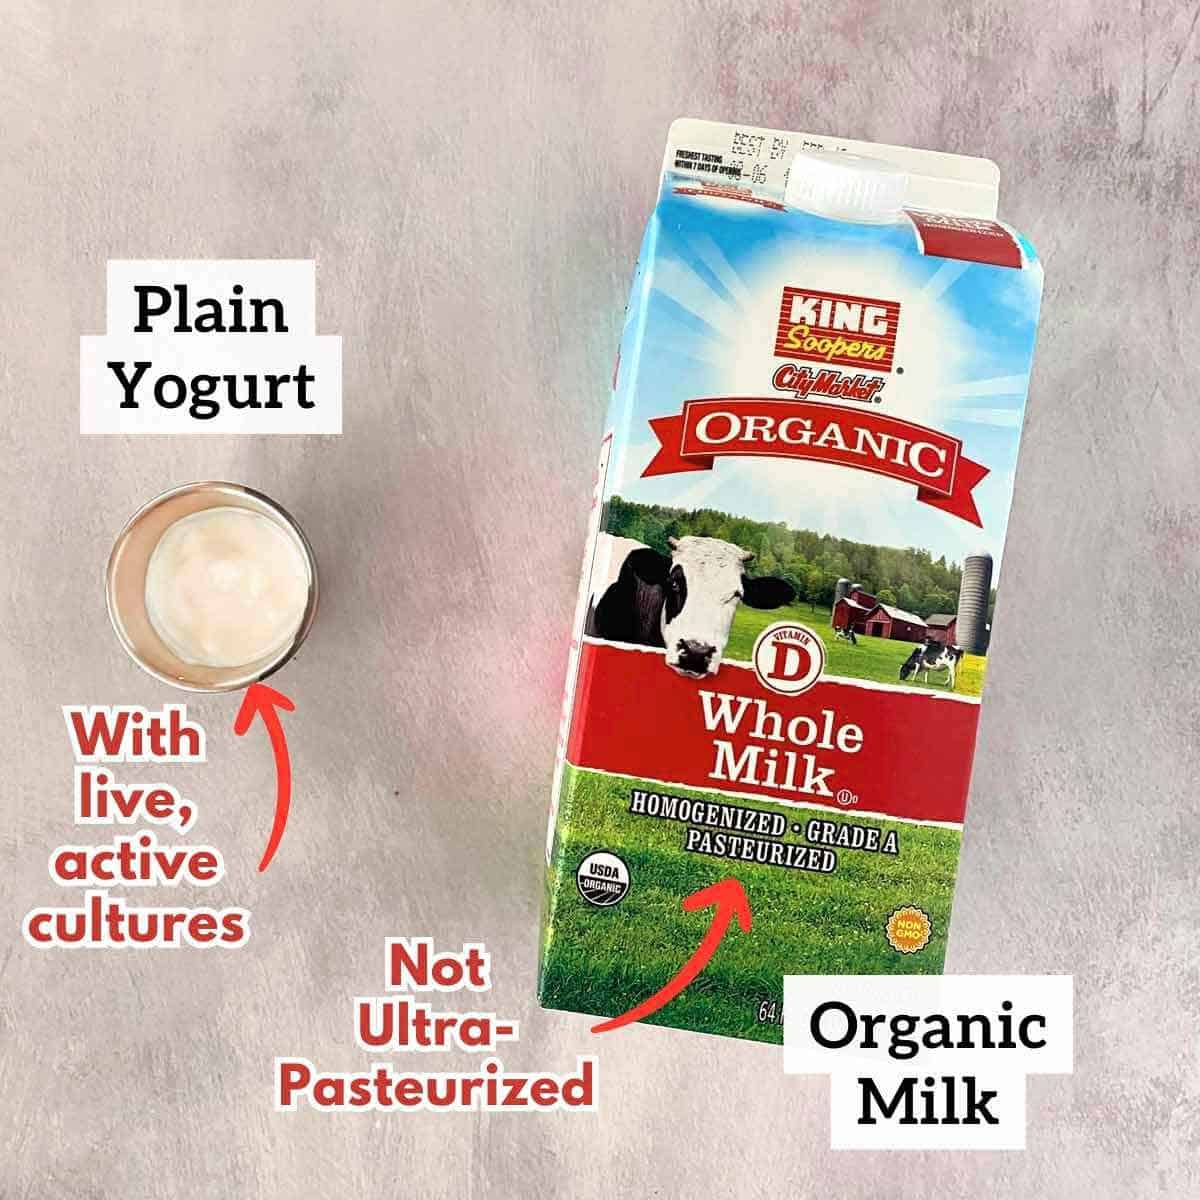
1/2 gallon milk – fat content of your choice. I generally use organic whole milk or 2% milk. The higher the fat content in the milk you use, the creamier your yogurt will be.
Note: I prefer to prepare this recipe with organic milk, which is produced without any synthetic chemicals, hormones or antibiotics. (Antibiotics may interfere with the yogurt-making process.)
Make sure you use regular pasteurized milk instead of ultra-pasteurized. Why? Ultra-pasteurized milk is briefly heated at a high temperature that can kill the live cultures in the milk.
2 to 3 tablespoons plain prepared yogurt (make sure it contains live, active cultures)
Note: After making your first batch, you can simply save a couple tablespoons of your homemade yogurt to start the next batch. I love that this process becomes indefinitely sustainable!
Money Saving Tip
If your grocery story has a bargain section in the dairy case, check for organic milk that is nearing its expiration date.
This milk is perfect for yogurt making, and is often sold at a discount.
Cooking Equipment
Here’s what you’ll need to prepare this homemade Greek yogurt recipe:
- Cooking thermometer – either a candy thermometer or an instant-read thermometer work best
- Large mesh strainer
- Mixing bowl that the strainer fits inside, so the yogurt can drain
- Cheesecloth to fit 4 layers when draped over the strainer
Step by Step Directions
To make regular yogurt without a yogurt maker, I’ve always followed the basic recipe in the Joy of Cooking cookbook.
The finished yogurt is then strained through cheesecloth for a few hours to release extra whey and liquids and transform into creamy Greek yogurt. Here’s the process:
STEP ONE: To begin, pour 2 tablespoons of the milk in a small bowl and reserve.
STEP TWO: Pour the rest of the milk into a double boiler or heavy-bottomed pan and turn the heat to medium. If using a double boiler, cover the milk. If the pot is directly on the burner, stir it and watch it very, very carefully so you don’t burn the bottom.

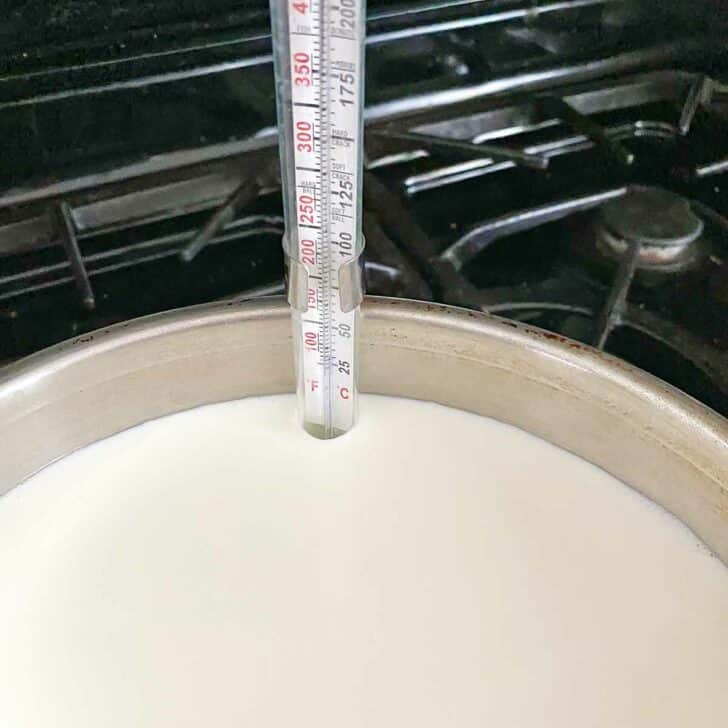
STEP THREE: Heat the milk to 180 degrees F. It helps to clip a candy thermometer to the side of the pan so you can carefully watch the temperature as it rises. Or you can check frequently with an instant read thermometer.

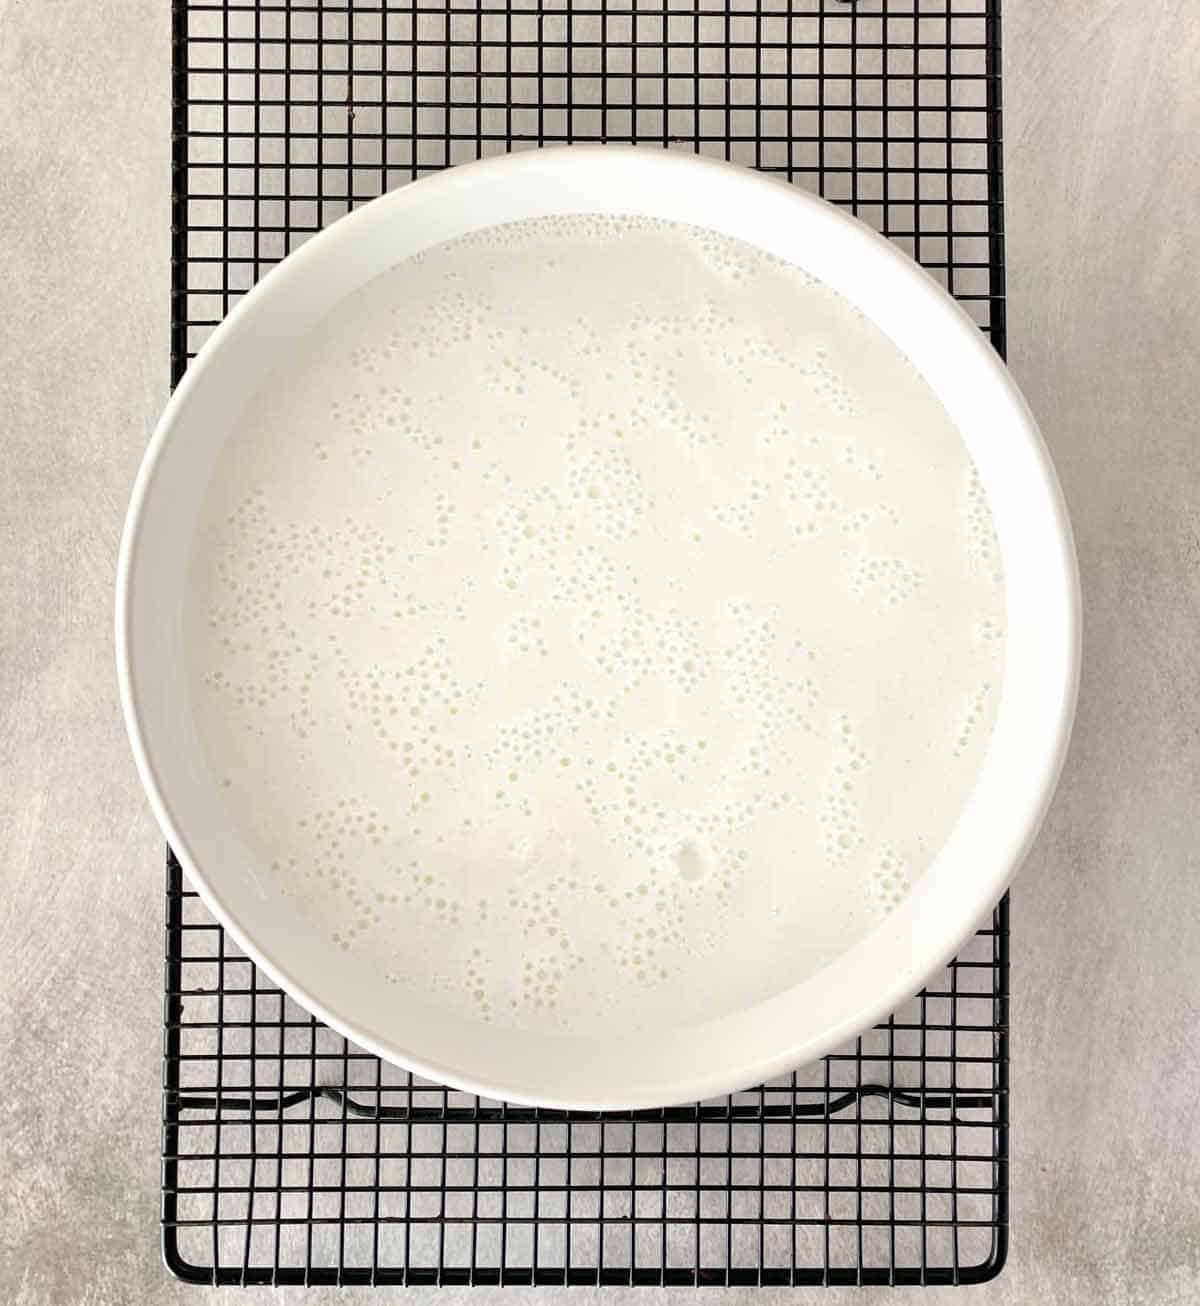
STEP FOUR: As soon as the temperature reaches 180 degrees, F, immediately remove the pot from the stove. Pour the milk through a wire mesh strainer into a 3 quart baking dish and leave it uncovered.
Put the dish on a cooling rack at room temperature, and let the milk cool to between 105 and 110 degrees F. Stir it a few times during the cooling process to prevent a “skin” from forming on top of the milk.
In our kitchen, this took about 50 minutes. (Note: remember to leave the dish completely uncovered at this stage, so the good bacteria from the air can start working their magic!)
STEP FIVE: While you’re waiting for the milk to cool, turn on your oven to the “warm” or “proof” setting. If your oven doesn’t have that setting, turn it to 150 degrees F.
STEP SIX: Combine the 2 tablespoons of milk you saved with 2 1/2 tablespoons prepared yogurt in a small bowl and reserve.
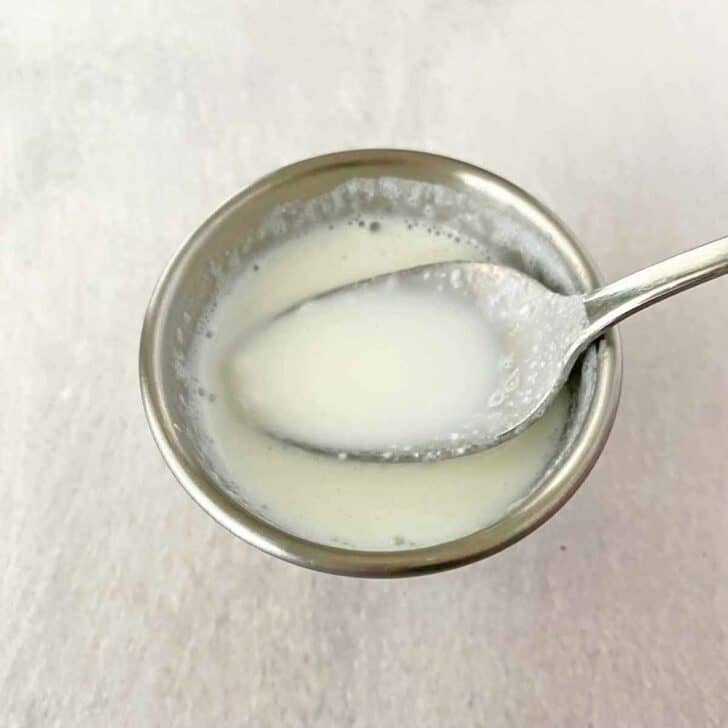
PRO TIP: Resist the temptation to add more than 3 tablespoons yogurt. According to the Joy of Cooking, “you may wonder why so little starter is used and think that a little more will give a better result. It won’t. The bacillus, if crowded, gives a sour, watery product.”
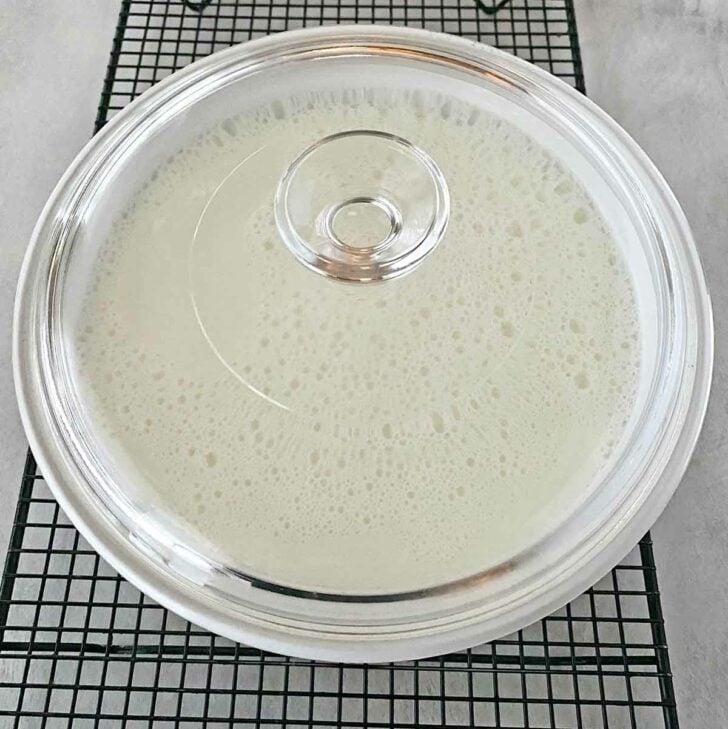
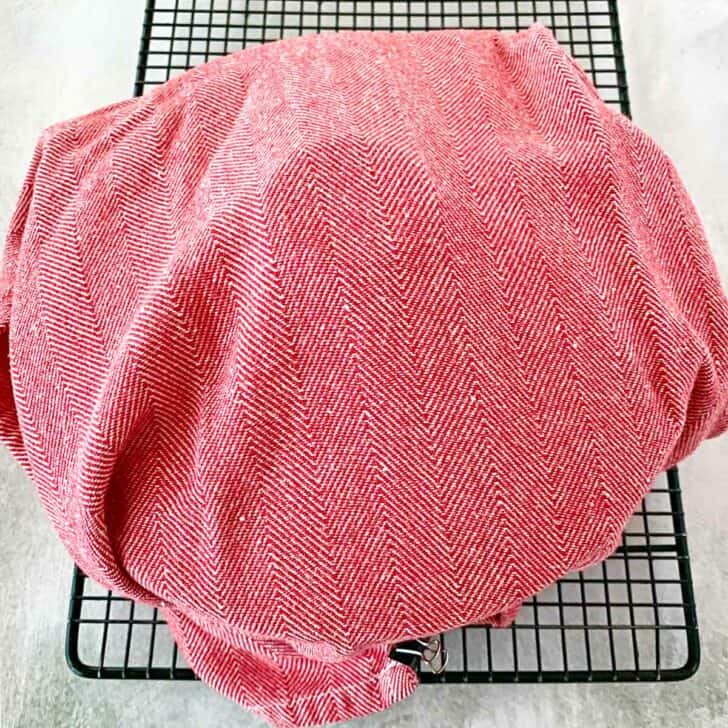
STEP SEVEN: Once the milk has cooled to between 105 and 110 degrees, add the yogurt-milk mixture and stir well to combine. (Don’t forget this important step.) Put the lid on the casserole dish and cover it with a dishtowel to help insulate it from temperature fluctuations.
STEP EIGHT: Turn your oven off, but now turn the oven light on. Just the light from the oven should keep the dish warm enough to enable the yogurt-making process.
Put the towel-covered dish in the oven, making sure that the towel isn’t touching the oven lightbulb, and leave the oven light on.
Note: If your oven light doesn’t emit any heat, you can alternately put the towel-covered dish on a heating pad set on “low,” or put it in a cooler with a snug-fitting lid and several sealed jars of hot water to maintain the heat.
Leave the yogurt undisturbed for 7 or 8 hours, or overnight.
STEP NINE: In the morning, carefully take the dish out, unwrap it and remove the lid, and check to see whether the milk has turned to yogurt. After ten hours, this is how our yogurt looked:
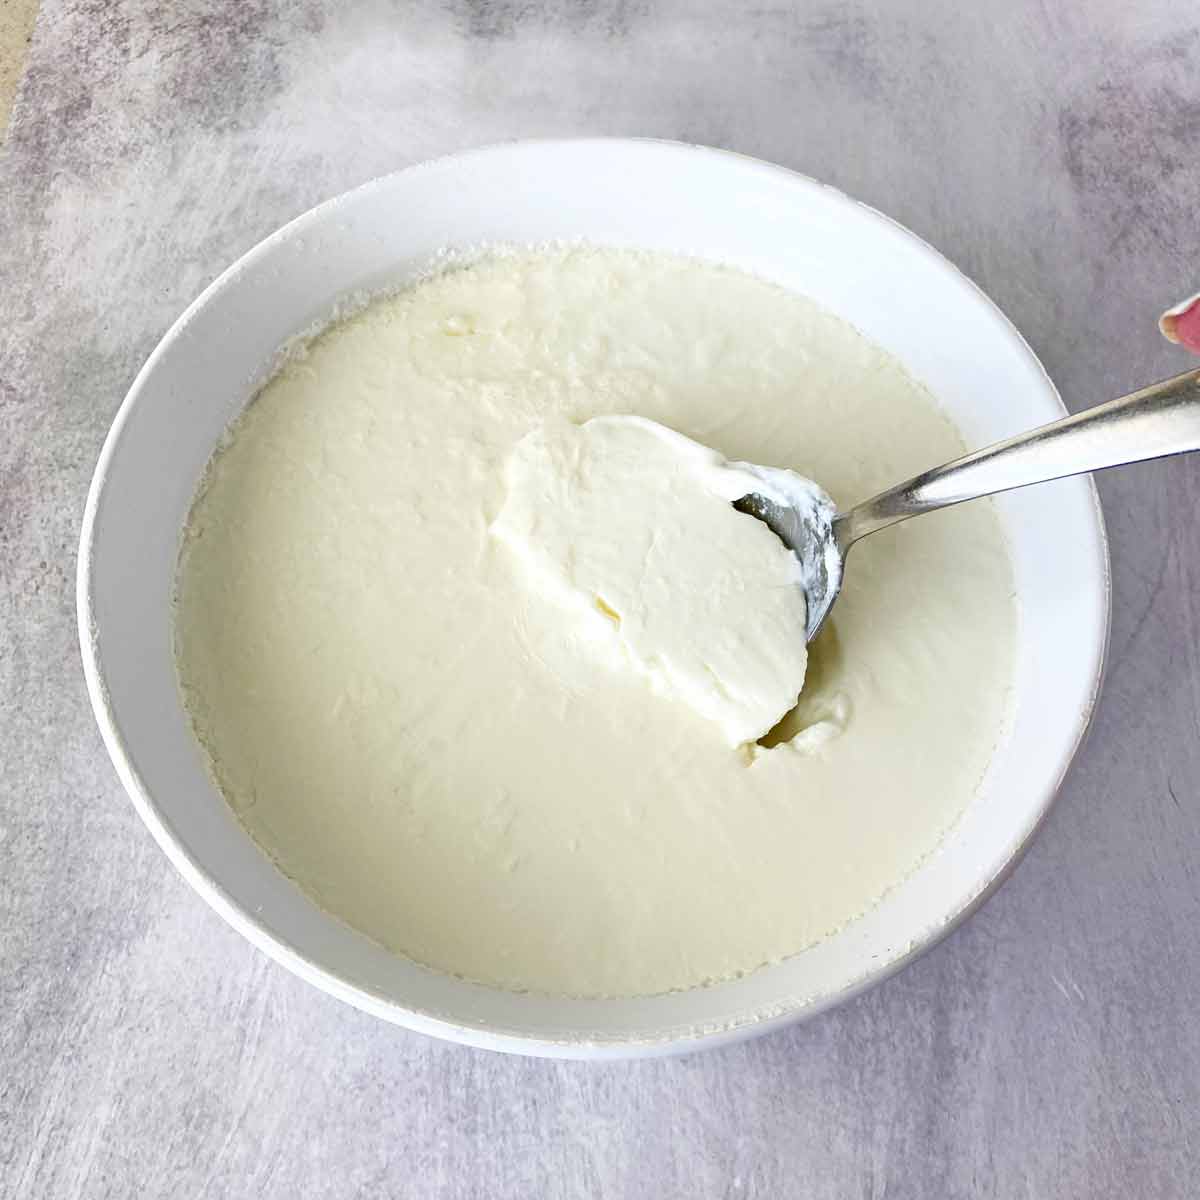
If your batch isn’t quite thickened, return it to the oven and check on it again in an hour. Once the yogurt is sufficiently thickened, you can stop at this stage if you want regular yogurt. Just stir the mixture and refrigerate it; you may need to pour off a little of the watery liquid. Don’t forget to turn off the light in your oven!
STEP TEN: For creamy Greek yogurt, refrigerate the yogurt in the covered dish for at least three hours to allow it to completely cool and thicken.
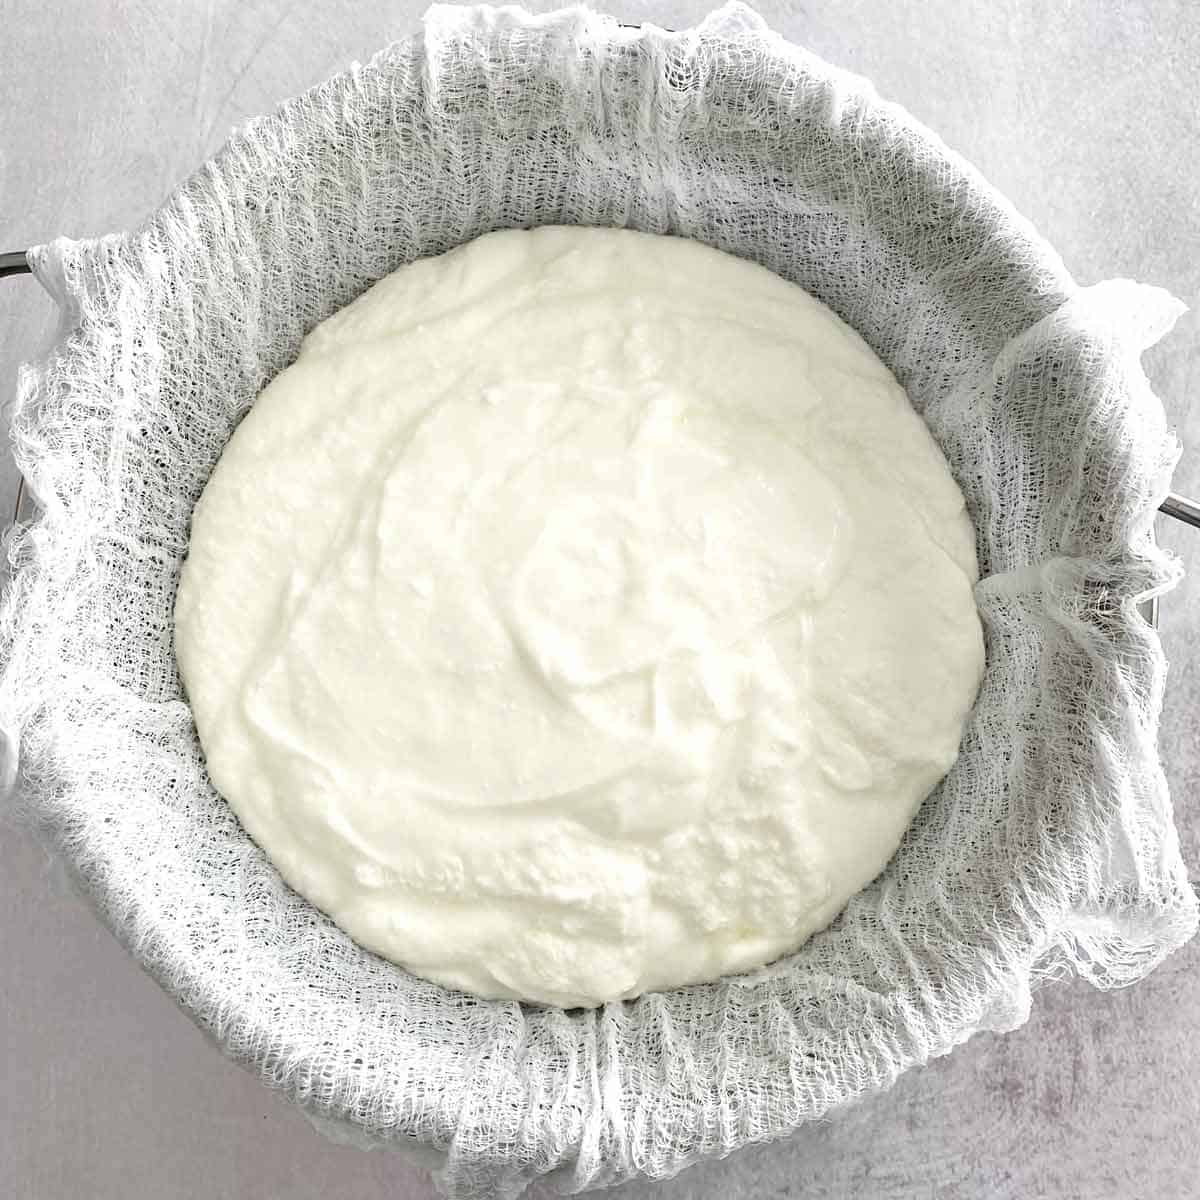
Meanwhile, line a large strainer with four layers of damp cheesecloth and find a bowl that the strainer will fit inside:

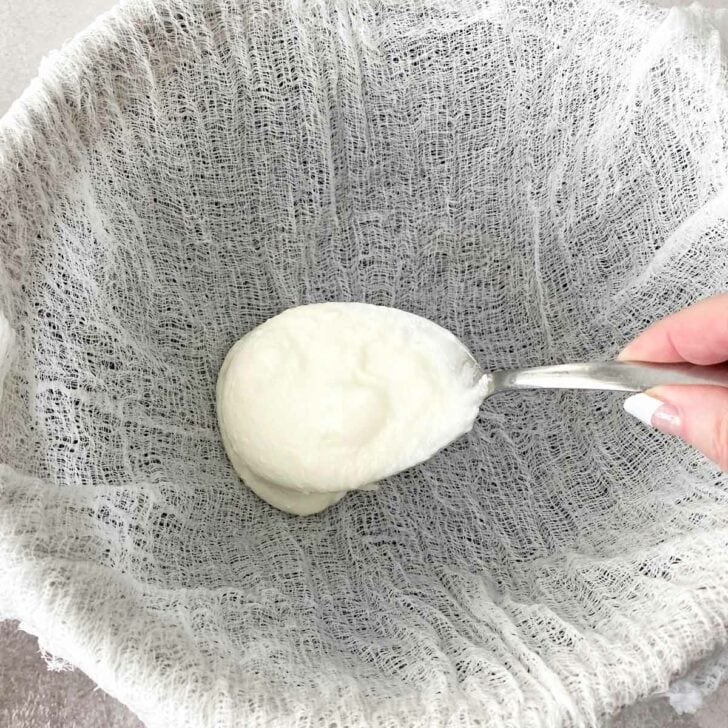
STEP ELEVEN: Put the strainer inside the large bowl, and spoon in all the yogurt to start the straining process.
Refrigerate for one hour. Pour out the liquid that has accumulated in the bottom of the bowl. This is the whey—that’s right, the very same delicacy Little Miss Muffet ate while she was sitting on her tuffet.
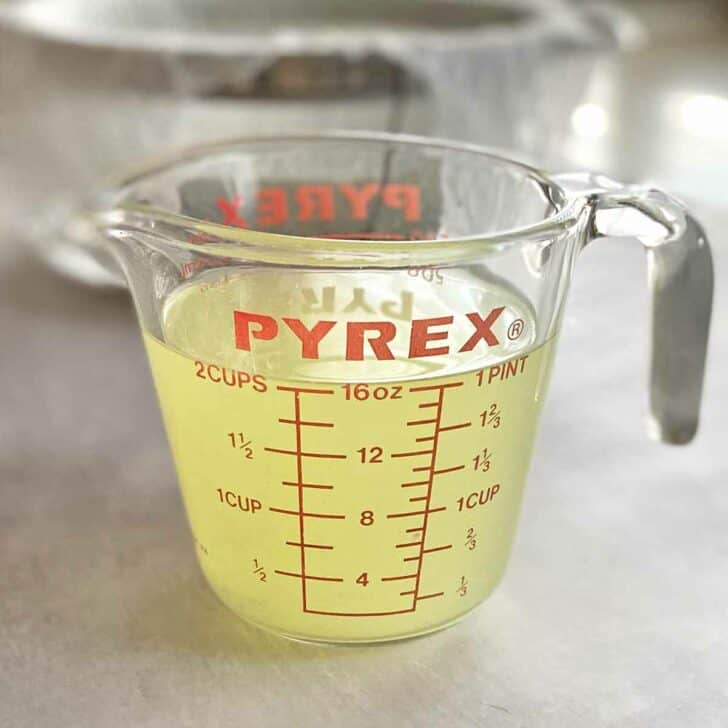
You can save the whey and use it for cooking or baking (like this yummy Whey Sourdough Bread).
Return the bowl to the refrigerator for one more hour, and strain the liquid again. Our batch drained off about two cups of whey, but you may have more or less and that’s fine.
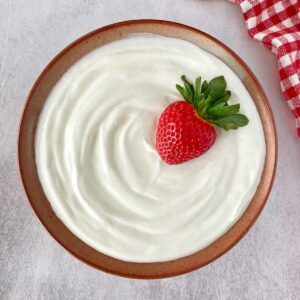
The yogurt should now look thick and creamy:
STEP TWELVE: It’s ready to serve! Transfer it to a bowl and stir it for a minute or two to smooth the thick yogurt before serving. Or spoon it into a container and refrigerate it, tightly covered, for up to a week. Makes about 6 cups, or 8 6-ounce servings.

Serving Suggestions
You can enjoy the Greek yoghurt as is, or top it with:
Remember to save a couple of tablespoons of your homemade yogurt so you can use it as starter for the next batch!
Other Ways to Use Greek Yogurt
- Use it in place of sour cream in your favorite dip recipe.
- Make Tzatziki Sauce, the sauce/dip that’s popular with gyros and in Mediterranean cuisine.
- Spoon it over a baked potato.
- Blend it into a breakfast smoothie.
- Make yogurt popsicles!
Troubleshooting: If Your Homemade Greek Yogurt Doesn’t Thicken
After many successful batches of homemade yogurt, I recently had a big FAIL. The only thing I’d done differently was to use our smaller, upper oven to incubate the yogurt instead of the lower oven I usually use.
When I pulled the yogurt out the next morning it hadn’t thickened at all; it was simply a big bowl of warm milk. I was so disappointed! At first I suspected the milk, because I’d used the big-name brand of organic milk that is known to be ultra-pasteurized. But when I measured the temperature of the milk, it was 130 degrees – too hot.
I decided to experiment with the failed batch, and let the milk cool back to 110 degrees. Then I added 2 more tablespoons of yogurt mixed with 1 tablespoon of milk. (My thinking was that the too-high temperature had killed the live cultures from the previously-added yogurt.)
I wrapped the bowl in a towel, put it in the lower oven with the oven light on, and let it rest for 8 hours.
When I opened the lid, I was amazed to see that the batch was thick and creamy. In fact, it was one of the thickest batches I’ve ever made. The consistency was slightly sticky, but after I strained the yogurt it was fine.
So if you ever have a batch that fails, you may want to try again and try to find the right spot where you can keep the yogurt at that ideal temperature of about 110 degrees F.
Printable Recipe Card
If you enjoy this recipe, click on the stars ⭐️⭐️⭐️⭐️⭐️ below to leave a rating! It helps us so much, and we love reading your comments, too!
Homemade Greek Yogurt
Equipment
- Candy thermometer
- Large mesh strainer
- Large mixing bowl
- Cheesecloth
- 3-quart casserole dish
- cooling rack
- Large dishtowel
Ingredients
- 1/2 gallon whole organic milk
- 2 1/2 tablespoons plain yogurt with active cultures
Instructions
- Pour 2 tablespoons of the milk in a small bowl and reserve.
- Pour the rest of the milk into a double boiler or heavy-bottomed pan and turn the heat to medium. If using a double boiler, cover the milk. If the pot is directly on the burner, stir it and watch it very, very carefully so you don’t burn the bottom.
- Heat the milk to 180 degrees F. It helps to clip a candy thermometer to the side of the pan so you can carefully watch the temperature as it rises. Or you can check frequently with an instant read thermometer.
- As soon as the temperature reaches 180 degrees, F, immediately remove the pot from the stove. Pour the milk through a wire mesh strainer into a 3 quart baking dish and leave it uncovered. Let the milk cool to between 105 and 110 degrees F, stirring a few times during the cooling process to prevent a “skin” from forming on top of the milk.
- Turn on your oven to the “warm” or “proof” setting. If your oven doesn’t have that setting, turn it to 150 degrees F.
- Combine the 2 tablespoons of milk you saved with 2 1/2 tablespoons prepared yogurt in a small bowl and reserve.
- Once the milk has cooled to between 105 and 110 degrees, add the yogurt-milk mixture and stir well to combine. Put the lid on the casserole dish and cover it with a dishtowel to help insulate it from temperature fluctuations.
- Turn your oven off, but now turn the oven light on. Just the light from the oven should keep the dish warm enough to enable the yogurt-making process. Put the towel-covered dish in the oven, making sure that the towel isn’t near the oven lightbulb, and leave the oven light on. Leave the yogurt undisturbed for 7 or 8 hours, or overnight.
- After 8 hours or the next morning, carefully take the dish out, unwrap it and remove the lid, and check to see whether the milk has turned to yogurt. If your batch isn’t quite thickened, return it to the oven and check on it again in an hour.
- Once the yogurt is sufficiently thickened, place the dish in the refrigerator for 3 hours. Cut 4 pieces of cheesecloth to fit inside a large wire mesh strainer. Run the cheesecloth under water and squeeze out as much water as you can.
- Line the strainer with the cheesecloth and place it inside a large mixing bowl. Spoon all of the yogurt into the strainer. Refrigerate for 1 hour and pour the liquid that has accumulated into a large measuring cup. Return the bowl to the refrigerator for one more hour, and strain the liquid again.
- Your delicious Greek yogurt is ready to enjoy! Stir it for a minute or two to smooth the mixture before serving. Or spoon it into a container and refrigerate it, tightly covered, for up to a week. Makes about 6 cups, or 8 6-ounce servings.
Notes
Nutrition
Save for Later
If you use Pinterest to save and share ideas, here’s a handy pin:


Eliza Cross is the creator of Happy Simple Living, where she shares ideas to help busy people simplify cooking, gardening, holidays, home, and money. She is also the award-winning author of 17 cookbooks, including Small Bites and 101 Things To Do With Bacon.


Thank you for this recipe. I tried it for the first time yesterday. It was super easy. I accidentally used Ultra-Pasteurized Organic Milk, so next time I will use just Pasteurized. The yogurt turned out great. I strained it overnight. Next time I will just strain it for 1 or 2 hours.
Sandra – I’m so glad you were happy with the result and thanks for your comments.
How do you calculate the amount of protein in the homemade yogurt? Is it the same as the milk? I’m not sure since the whey is drained off.
See above – Emily asked a similar question. For the highest protein content, add some powdered milk and make Greek yogurt, which will concentrate the protein content. Good luck and thanks for your question!
I think you just saved me a lot of money. I buy more yogurt than anything else in my fridge. My son and I are trying it tonight!
Good luck, and I hope you and your son make many wonderful batches of yogurt together, Brad! :-)
Can the yogurt be made w/ non fat milk? Any experience w/ this? Any alterations to the recipe? I’m def. going to try it. Love the streamlined recipe and your relaxed substitutorial (?) way w/ a recipe! Card.
Yes, you can totally make yogurt with non-fat milk. You can even make the strained, Greek yogurt with nonfat milk. I prefer 1% myself, but non-fat will work fine. Just follow the directions exactly and I think you’ll love the result. Let us know how it turns out!
Thank you for the recipe! I can’t believe I made my own yogurt. It was easy and I didn’t have to wait all night. Only took 6 hrs. WOW! Yogurt is one of my fox staples and to know I can make it myself without chemicals and sugar all the better. My brother is a health nut and a chef and I can’t wait to tell I did it. Thank you so much. :)
Anne, your happiness is infectious and I’m so glad you’re enjoying making your own yogurt!
I have my 4th batch cooling on the counter right now, and I am so happy to have found this recipe. I like it plain, but my daughter loves it with some vanilla bean paste added for flavor. I noticed that most of the organic milk at the grocery store was ultra-pasturized in the half gallon and quart containers, but that the same brand in gallon containers was not ultra-pasturized. I thought that was odd. Anyway, so happy to have found this recipe and your site thank you so much!
What a great idea, Karen. Readers, in case you’re not familiar with vanilla bean paste it’s like a thick version of vanilla extract that contains the little vanilla bean seeds – and the truest vanilla flavor ever. You can buy it at places like King Arthur Flour and Williams Sonoma.
Came across this advice while Googling Yogurt-making, as I’m getting still getting 14-16 liters (30 pints to you Yanks) of ultra full-cream milk a day from our Jersey Cow Chloe, and the pigs we were fattening on it have gone to the great mud-bath in the sky (and our freezer!) Our neighbours take what they can and it seems a shame just to dump the rest, but down here in New Zealand we are only allowed to sell 5 pints a day at the farm gate.
Question 1: is it necessary to pasturise milk only minutes from the cow before dumping the starter in? It’s still warmand can sit on a rack over the log-stove for the day incubating – it’s mid-winter in New Zealand.
Question 2: a previous attempt to make yogurt in a kit with little pottles resulted in a layer of cream on top 1/2″ thick like the skin on a tin of paint. Is there any way of home homogenising milk?
Sort of question 3: the aforesaid previous attempt produced what tasted like yogurt under the skin but refused to thicken. I partially solved that by using as a started a powdered yogurt mix – just add water – but I added a tablespoon per liter of milk. I’d like to try the Greek style but without ‘cheating’ and adding the powder I suspect it would all just drain through the cheese-cloth.
Next stop, cheese.
Hi, Tom — see Daniel’s helpful response to your questions just a few boxes down, and give Chloe the Jersey milk cow a scratch behind the ears!
Hi there, I just tried this for the first time. It is in the fridge right now straining and I can’t wait for it to be done. But I had a question about the taste. You mentioned that yours comes out with a mild taste but mine came out pretty sour. It’s fine with honey, but not what I was expecting. I am wondering if the length of time I had it in the oven had to do with it. I put it in with only the oven light on at 10pm and didn’t take it out until 9:30 am cause I slept in. So is that way too long and had I taken it out after 8 hours, it would of been more mild? From what I’ve read, it sounds like the sour it is the more fermented it is and healthier for you, but I still would like to have some control over it if I wanted it a little sweeter. Thanks for this recipe, I can’t wait to try the Greek yogurt tonight!
Hi!
What a great night’s sleep you got! Trying not to be jealous. :-) But with regard to your yogurt, I would have to guess that the extra fermenting time resulted in a more tart taste in your case. The batches I’ve made sit in the oven with the oven light on for 8 hours, and the yogurt is mild and creamy — amazing. So maybe try making a batch during the day next time, because for gosh sakes–if you can keep getting 11 1/2 hours of sleep you shouldn’t change a thing about your nighttime schedule.
xo
Eliza
@Tom from Down Under-
1. The step of heating the milk to 85deg C (185F) does much more than pasteurize the milk, (kill undersirable bugs). Fresh raw milk is remarkably resistant to spoilage due to the presence of certain live enzymes. Unfortunately, these same enzymes also antagonize the yogurt-making bugs, so the high temp is necessary to de-activate these natural preservatives.
The natural milk proteins are also partially denaturized by the heat, which impoves the texture markedly. Put it simply, do NOT skip this step!
When I make Greek Yogurt, I use a bain-Marie to heat the milk, stirring it constantly so it doesn’t skin-over. I keep it at 85deg C (185F) for 30 minutes (yes, one half-hour) which results in a thicker product. I cool the upper pot in a sink full of cold water before I pitch in the starter. The rest of the procedure is standard, and the author does a good job describing what to do.
By the way- don’t recycle your yogurt as a starter in perpetuity. After too many generations, the bugs evolution changes their biology and may produce an off-taste.
As far as homogonization goes, that requires special equipment to force milk through a set of very small orifices, rupturing the membranes of the suspended fat globules. Not something to do at home. Just mix the butterfat back into the yogurt. (I skim mine and eat it straight-up when I am in the mood for an extra-rich treat!) It is not likely to separate when you make Greek yogurt, in any event.
I live in the hills of upper-eastern Tennessee, and I get my milk fresh from a neighbor’s Jersy Moo-Cow.
Yum!
Thanks for this great information! We have no nearby cows in our suburban neighborhood but I wish we did.
Hi. I used your recipe last night and was very careful to stir stir stir. The only thing I did differently was double the recipe. It has slept in the oven for about 9 1/2 hours now. This morning it loooks like your picture except it is much more watery. I don’t think we used too much yogurt. Do you think it needs to stay in the oven longer?
I also tasted it and it tasted warm, like a combo of sour milk and yogurt, and thin. It’s the consistency of… hmm… partially pudded pudding.
Would you say I should leave it in the oven longer or have I screwed it up? Please answer as soon as you can! Thanks.
Laura Lee,
I would suggest letting the yogurt ‘set’ for another couple of hours in the warm oven if it still seems thin. When you refrigerate it, it will thicken and then you can pour a little of the whey off, too. Good luck!
xo
Mine turned out kinda thin – nothing I’m sure another sit thru the cheese cloth won’t cure – but super super tart, like drinking straight lemon juice – I used 2 tablespoons of plain yogurt – any ideas what I may have done wrong. I really want to start making my own yogurt – both to save money and to ensure we are eating healthier.
Hi, Rebecca –
Sorry for the disappointing result. :-( But you might not have done anything wrong. Perhaps the plain yogurt you used for a starter was “off” and the bacteria weren’t all alive. You might experiment with another brand. Also, the longer you ferment the yogurt generally the more sour it will become. So you might try your next batch with a shorter resting time in the oven. Make sure you follow each direction exactly as far as the heating and cooling temperatures, and don’t cover the dish with a lid or anything while you’re waiting for the temperature to drop to 105-110 degrees F.
If you want a foolproof way to make thicker yogurt, you can add 1/4 cup of dry milk powder to the milk before you heat it initially. The added protein will help thicken the mixture.
Good luck and I hope you’ll try again!
The best way I found to incubate yogurt was a big cooler and heating pad set on medium, but next time I’m going to try it your way! Seems so much easier.
I had one batch that was sooo tangy (twaaaang!) that I couldn’t tolerate it. I drained most of the whey and added fresh milk. The previous batch was yo cheese and I didn’t want another one, so this rescued the yogurt. (I am the queen of failed yogurt.)
The one batch I made that was really tangy also happened to be the batch I left in the oven the longest. You might try this: heat your oven to 150 degrees while you are making the yogurt mixture. Turn it off as soon as you pour the yogurt in the container to cool on the countertop, and turn the oven light on at that time. Proceed according to the directions, and start checking the yogurt after 6 or 7 hours. This may give you the firmness you want, without the extra tangy-ness. Good luck and let us know how it turns out!
Thank you for the great recipe and tips, I had planned to try the crock poy, but then found your method. I am so happy with the results! No more Chobani for me, homemade organic yogurt for a fraction of the price!
Thanks, Tawn. Isn’t it satisfying to make your own? I love it on so many levels.
I have been making yogurt for years, and since I did not have a thermometer when I began I never have used one. I heat the milk in a double boiler until the water boils, stirring frequently I cool the milk in the pot on the counter for 40 minutes. I heat a small oven to 150 ( lowest setting) then turn it off, add starter to milk turn off the oven and let culture for 6-8 hours. Works every time!
Thanks for sharing your process. I’d like to experiment with this since it sounds easier. After all, people have been making yogurt since Biblical times without thermometers so it should be do-able! :-)
I now strain my yogurt with paper towels or coffee filters. No problems. I now heat my milk in the microwave and then eventually “cook” in the oven on my proof setting or with the oven light on. In the past I had great success with making a smaller amount of yogurt on a heating pad. Now I make 3-4 quarts at a time.
Great idea, Cindy. I also like your suggestion to use the ‘proof’ setting in the oven. Soon we won’t be using incandescent light bulbs because they’re being phased out, which is a very very good thing, but I’ll need to adjust this recipe accordingly!
Just to let everyone know in relation to the asterisk…. All milk, whether it is organic or not, does NOT contain antibiotics. It is all tested before it is put onto the shelves and any milk that tests positive is rejected.
Thanks for your comment and clarification, Moo Moo, and I updated the notation accordingly.
Readers, for further information you might want to check out this article “F.D.A. and Dairy Industry Spar Over Testing of Milk,” in the January 25, 2011 New York Times:
“Today, every truckload of milk is tested for four to six antibiotics that are commonly used on dairy farms. The list includes drugs like penicillin and ampicillin, which are also prescribed for people. Each year, only a small number of truckloads are found to be “hot milk,” containing trace amounts of antibiotics. In those cases, the milk is destroyed.
But dairy farmers use many more drugs that are not regularly tested for in milk. Regulators are concerned because some of those other drugs have been showing up in the slaughterhouse testing.”
According to the article, in 2008 federal inspectors found illegal levels of antibiotics in a fraction of the 2.6 million older dairy cows bound for the slaughterhouse that year. Concerned that those antibiotics might also be contaminating the milk Americans drink, the F.D.A. wants to start testing for the two dozen antibiotics that are actually used. The plan was met with opposition by the Dairy Farmers of America.
Thanks so much for this info. I’m so excited to try it.
Tyeanna, happy yogurt making and let us know how it turns out!
This is great! Simple, and it is organic (if you use the organic products)!
I used to (sometimes) make large batches of yogurt on a ship and used the warmer to ‘keep’ it then refrigerate, but haven’t really gave it a second thought about making it at home. But just recently (and the addition of a young one) my taste buds have change and really like the ‘Greek’ style yogurt.
Works great for smoothies too!
Thanks, Tyrone, and I enjoyed visiting your blog, too! Readers, check out http://tyronebcookin.com/ for some great postings about food.
This is fabulous! I’m a Greek Yogurt lover and your technique was easy to follow. Thanks for sharing!
Hurray! If you’re happy, I’m happy. Thanks, Kat.
Thanks for article. I have been making the yogurt using an old Salton Cosmopolitan Yogurt Maker with blue lid and 5 white cups that I bought at a thrift store for $3.00. I love the way it comes out. I have made it a few different ways sometimes using yogurt that I purchased and sometimes the yogourmet starter. The last time I made it I used more than a few tablespoons of the left over yogurt for the starter and it was more sour than usual. Thanks for the tip. Question: My maker did not come with instructions so I found some online. It says do not use any yogurt with sugar and it will not process right and vanilla would have sugar in it I believe. Any thoughts on that? Also I always add powdered non-fat milk to my mix as I am warming the milk as the instructions I found said that makes thicker yougurt. Thanks, Barbara
Thanks for the tip about adding the powdered milk, Barbara. In answer to your question, I haven’t tried making it with sweetened yogurt so I’m not sure if it will affect the process or not. Maybe one of these days I’ll conduct an experiment! Thanks so much for stopping by. :-)
Hi,
thanks for this recipe. However, I have not had much luck after making 3 batches.lol
-My first batch I followed the instructions exactly. I added the 1/3 cup of powdered milk for thicker yogurt. The problem I had was my oven light burnt out over night (8 hours) and the yogurt was like water.
-Second batch after getting a new oven bulb. well after warming the milk must have not stirred enough and burnt the bottom of the pan. The whole house smelled like burnt milk. The milk also tasted burnt. yet instead of just throwing it away I would try it again and practice. This time I forgot to add powdered milk. Yet after 8 hours it was yogurt. thicker and nice. yet it tasted like burnt milk. :-)
-Third batch. I was determined to make it work. This time I stirred really well. no burnt milk. I also once again added the 1/3 cup of powdered milk as I was warming it. After 9 hours and in the fridge over night its like thick soup. I tried to strain it in some filters and nothing strained its too thick but not like yogurt.
Any ideas why this is not working? I am wondering if the powdered milk is the problem. Does the milk have to be a certain temp when I add it?
The yogurt I used was ff fage greek. I also use skim milk.
Any advice would be greatly appreciated.
thank you,
david
Dear David,
I am so sorry to hear this! But I applaud you for being persistent. Here’s what I suggest. I have a feeling your oven may not be getting warm enough from the lightbulb. Why don’t you preheat the oven to 150 degrees during the step when the cooked mixture is on the counter cooling. Turn the oven off just before you put the covered, towel-wrapped container in the oven, but do leave the oven light on. Then proceed as directed. Also, would you be willing to try a batch with 1% milk? I think the little bit of added fat will help it thicken, too. I would love to hear back from you if these suggestions help, and I will be sending you positive yogurt-making vibes!
I just made this yesterday and WOW! It is so delicious and I love that I can save on my grocery bill! Thank you so much for sharing! :)
I’m so glad you were happy with the results, Jenna! I love the savings, too. :-)
Hello Eliza,
I have tried this twice and had some luck. The first batch, I forgot about my oven light, so it was still liquid after 8+ hrs. The second time it worked…but my yogurt has a glue like consistency. I even strained if for several hrs and it still has this gooey texture.
Did I not leave it the oven long enough? It tastes great and I will be trying again, but just that I’d inquire, any thoughts?
Thanks!
Olivia
Dear Olivia,
It sounds like your yogurt was a little thin, so I’d suggest preheating your oven first to 150 degrees during the step when the cooked mixture is on the counter cooling. Turn the oven off just before you put the covered, towel-wrapped container in the oven, but do leave the oven light on. Then proceed as directed. I think the little bit of extra heat will jump-start the mixture. This has worked for me in the past and I hope it works for you! Let me know, okay? And thanks so much for stopping by.
xo
Eliza
A friend of mine told me she made her own yogurt and said it came out really good. When I asked her for the recipe, she pointed me to your website and said she followed your directions to the letter. My oven doesn’t have a oven light (it’s an old gas stove). It is lit via a pilot light. Do you think that the heat from the pilot light would be warm enough to process the yogurt? My 8 year old son LOVES to eat yogurt and I’d love to try making my own.
Thanks for sharing!
Is this process safe? Do you know how much fat, protein and calories would be in a cup?
I have been making Greek yogurt for quite awhile now and I love it. I had been eating the Fage brand for quite awhile and it was my favorite. Unfortunately, I saw the price rise and the size of the container shrink until I was paying almost $2.00 for 6 ounces. Something had to change so I turned to my bff, Google, to teach me how to make it at home.
I make it the same way you do. My oven doesn’t have a setting lower than 200 so I just set my oven to preheat and set the timer for 1 minute only. I do this while I’m putting the starter and powdered milk into the cooled milk.
I have really enjoyed reading your blog!!! Thanks!